
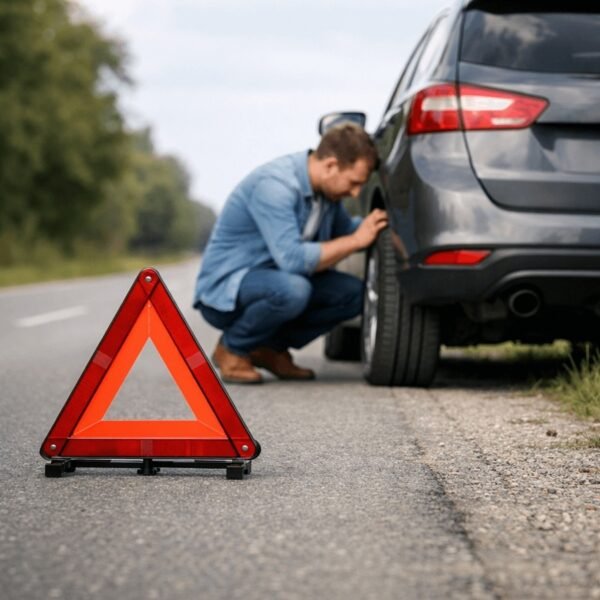
Getting a flat tyre is an experience most drivers will face. It can be stressful, especially for new and learner drivers. Knowing how to change the tyre is an essential skill that provides confidence and saves you from being stranded. This comprehensive guide will walk you through the entire process, from initial safety precautions to getting back on the road.
We will cover everything you need, including crucial flat tyre safety tips and a detailed puncture repair guide. By the end of this article, you will have the knowledge to handle a flat tyre calmly and efficiently.
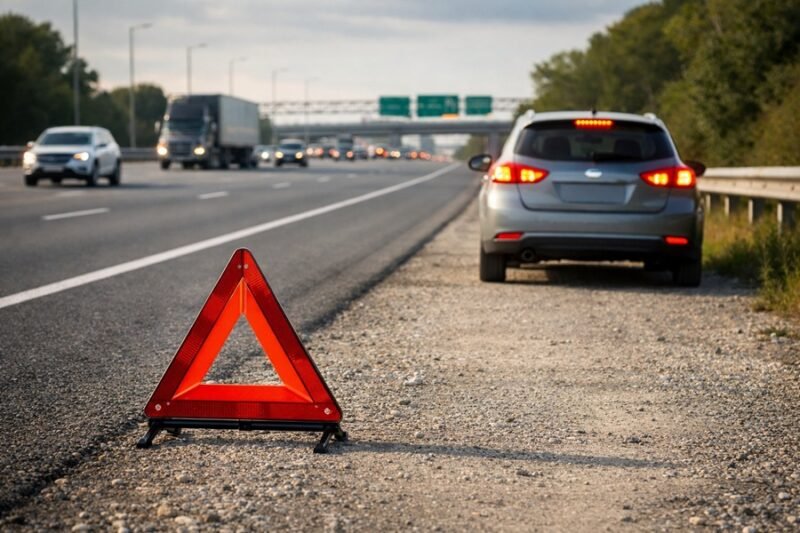
First Steps: Safety When Changing a Tyre on a Highway
Your immediate safety is the top priority. If you get a flat tyre, especially on a busy road or highway, follow these steps before you even think about the jack.
- Find a Safe Spot: As soon as you realize you have a flat, slow down and look for a safe place to pull over. An ideal location is a straight, level stretch of road with a wide shoulder. Avoid stopping on a hill or a curve.
- Turn on Hazard Lights: Your hazard lights make your vehicle more visible to other drivers. Turn them on immediately.
- Engage the Parking Brake: Once you’ve stopped, put your car in “Park” (for automatics) or in gear (for manuals) and firmly engage the parking brake. This prevents the car from rolling.
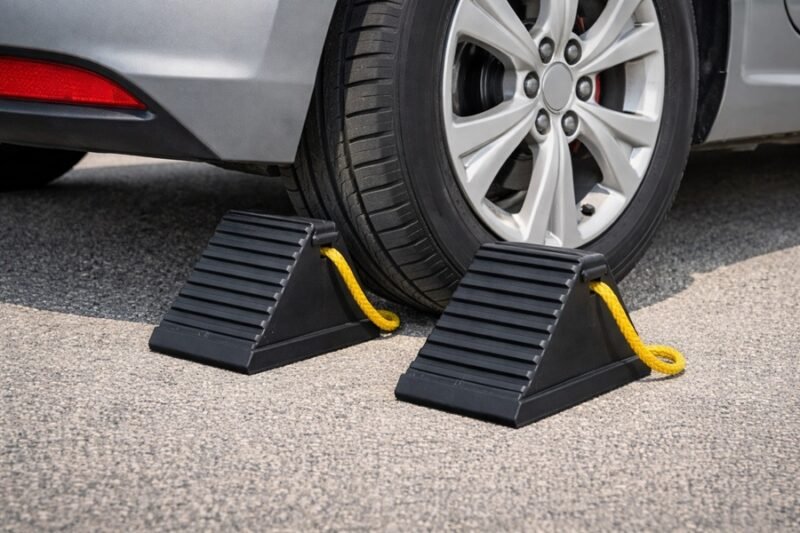
- Use Wheel Wedges: Place wheel wedges (or chocks) behind the wheels on the opposite end of the car from the flat tyre. For example, if your front right tyre is flat, place wedges behind both rear tyres. This adds another layer of security.
The Essential Toolkit: What You Need
Before you start, gather the necessary tools. Most cars come equipped with a basic kit located in the boot, often under the floor panel. You should have:
- A spare tyre (make sure it’s properly inflated)
- A car jack
- A lug wrench
- Your vehicle’s owner’s manual

It’s also a good idea to keep a pair of gloves, a flashlight, and a rain poncho in your car for these situations.
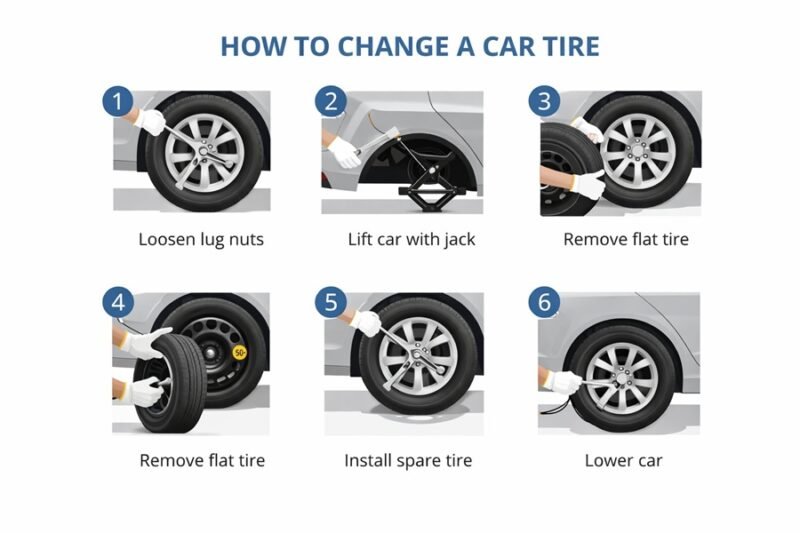
How to Change the Tyre: A 10-Step Puncture Repair Guide
With your car secure and tools ready, you can begin. Follow these steps carefully.
Step 1: Loosen the Lug Nuts
Before lifting the car, use the lug wrench to loosen the lug nuts on the flat tyre. You may need to remove the wheel cover or hubcap first. Turn the lug nuts counter-clockwise about a half-turn. Do not remove them completely yet.
What to do if lug nuts are stuck?
Sometimes, lug nuts can be extremely tight. If you’re struggling, try using your body weight on the wrench. You can stand on the end of the wrench, but be careful. A penetrating oil spray can also help loosen them if you have some available.
Step 2: Where to place the jack under the car?
Positioning the jack correctly is critical for safety. Your owner’s manual will show you the specific jack points on your vehicle’s frame. These are reinforced areas designed to handle the car’s weight. Placing the jack elsewhere can damage your car or cause it to fall.
Step 3: Raise the Vehicle
Once the jack is correctly positioned, use it to lift the vehicle. Follow the instructions for your specific type of jack. Raise the car until the flat tyre is about six inches off the ground. Never put any part of your body under the vehicle while it’s supported only by a jack. This is a fundamental rule of how to use a car jack safely.
Step 4: Remove the Lug Nuts and Tyre
With the car lifted, finish unscrewing the lug nuts you loosened earlier. Keep them in a safe place so you don’t lose them. Gently pull the flat tyre straight toward you to remove it from the wheel studs.
Step 5: Mount the Spare Tyre
Lift the spare tyre and align its holes with the wheel studs. Push it all the way onto the studs until it sits flush against the hub.
Step 6: Tighten the Lug Nuts by Hand
Put the lug nuts back on and tighten them by hand in a star pattern. This ensures the wheel is mounted evenly. Tighten them as much as you can by hand.
Step 7: Lower the Vehicle
Carefully lower the vehicle until the spare tyre is touching the ground but the car’s full weight is not yet on it.
Step 8: Fully Tighten the Lug Nuts
Now, use the lug wrench to fully tighten the lug nuts, again following the star pattern. Use your body weight to ensure they are secure.
Step 9: Lower the Car Completely and Stow Gear
Lower the car all the way and remove the jack. Put the flat tyre, jack, and lug wrench back in your boot. Don’t forget to retrieve your wheel wedges.
Step 10: Check the Spare Tyre’s Pressure
If possible, check the pressure of your spare tyre. Many temporary spares require higher pressure than standard tyres.
After the Change: What’s Next?
Getting the spare on is a major accomplishment, but you’re not done yet.
How long can you drive on a spare tyre?
Most spare tyres are temporary and not designed for long distances or high speeds. They are often called “donuts.” You should typically not drive more than 50 miles or exceed 50 mph on a temporary spare. Check the tyre’s sidewall for specific limitations. Your main goal is to get to a tyre shop to repair or replace your flat.
Considering Roadside Assistance
If you feel unsafe or are unable to change the tyre yourself, calling for roadside assistance is always a valid option. It’s better to be safe than sorry.
Conclusion
Knowing how to change the tyre is a valuable skill for any driver. By following these steps—prioritizing safety, using the right tools, and understanding the process—you can handle a flat tyre with confidence. Remember to get your flat tyre repaired or replaced as soon as possible and have your spare put back in its place for the next time you might need it.
For more helpful driving and maintenance guides, explore our blog or sign up for our newsletter.
FAQs
1. How long can you drive on a spare tyre?
Most temporary spare tyres, or “donuts,” are not meant for long-distance travel. You should generally not exceed 50 miles in distance or 50 mph in speed. Always check the specific recommendations printed on the sidewall of your spare tyre and plan to visit a professional tyre shop as soon as possible.
2. What to do if lug nuts are stuck?
If your lug nuts are too tight, try applying steady pressure with your foot on the lug wrench for extra leverage. Be cautious to maintain your balance. If they still won’t budge, a penetrating oil can help dissolve rust and corrosion. In some cases, a longer breaker bar may be needed for more torque.
3. Where do I place the jack under the car?
Your vehicle’s owner’s manual is the best source for this information. It will have a diagram showing the specific, reinforced jack points on the car’s frame. These are typically located on the metal seam just behind the front wheels or in front of the rear wheels. Using these designated spots is crucial for safety and preventing damage to your car.
For More details about How to Change the Tyre, We will update new article as soon.
Read Also: How to Write Address on DTDC Courier: A Complete Guide